Carving skis
A strong and distinctive sidecut, the “hourglass” shape of a ski, enables it to actually carve out turns as the middle is pressed down to the snow, forming a curved contact edge that naturally describes an arc. There are different, more specific, types of carving skis.
- Slalom racing or race-inspired carvers are relatively short skis designed for the tightest turns possible.
- Race carvers are the longest of the carving skis, which gives them a balance of turning ability and high speed capability.
- All-around carvers are exactly that. Beginners need them, and advanced skiers love them and can maximize their potential.
- Fun carvers are relatively new on the scene. They are the shortest skis by far, not exceeding 130cm, and are intended for absolute fun and maneuverability instead of stability and speed.
Learning to carve
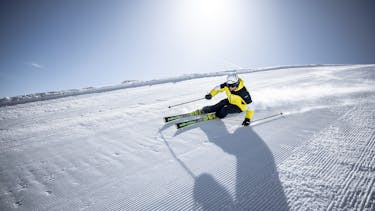
True carving skis and the carving technique are recommended for skiers with some experience and good basic technique. Above average speed in turns is required, as is good body and ski control, to really carve.
You’re digging those edges in and making full transition turns, so fitness and strength are also factors. Your legs will do the work, while your upper body remains relaxed but helps to initiate those turns. Skis remain at the same angle to the slope, basically parallel, throughout most of the turning process, though the outer ski will bear much more of the force.
Your first live-action training is to stand with your skis nearly parallel to the fall line of the slope, with one edge of each ski digging into the slope. Now lean in sideways into the slope, press your knees further down into the snow, and feel the edges bite even harder. Let your legs and feet do the work. This is the sensation you want to feel, and be confident in, as you’re skiing.
Out on the snow
- Assume a stance with your skis parallel, hip wide, as you ski downhill.
- Slowly put more weight on the ski that will be the outside ski in the turn. Bend your knees and increase the force on that ski.
- Don’t turn your body too much into the direction of the turn. Your legs do almost all of the movement.
- As you raise and straighten your upper body, you’ll come out of the bended knee position, unloading the skis and smoothly exiting the turn.
- When your upper body is fully upright, you’re in position to begin initiating the next turn, and transitioning to the other edges of your skis.
Advanced skiers will have a nearly immediate transition to the other edges, seeming to never touch the base of their skis to the snow. For those still learning, it’s perfectly all right for each turn to be a separate process, then gradually have them flow together.
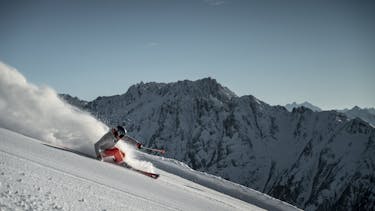
Body position
Overall body position is critical for smooth carving.
- Keep your rear over the skis. Let only the legs and feet move. Be smooth.
- For good edge grip, avoid leaning backward. Keep your body weight forward.
- Turn initiation begins with rolling the feet and ankles, then having knees and hips follow. Let the curved edge contact of the ski actually make the turn.

What to look for in a new pair of carving skis
As a general guide, consider a ski that is 10-15cm (4-6 in) less than your height.
From radical to subtle, the numerous sidecuts and turn radius options have a huge effect on how the ski performs, so this is definitely a case where a ski specialist can best advise you on your selection.
At Fischer we enable skiers to enjoy their sport and excel to the next level by introducing the most innovative, reliable and easy to use products. If you want to master carving, we’re confident we have the best ski for you.


